Cinemagraphs are little looping animated videos that are actually pretty simple to make, especially if there isn’t any movement in the scene.
![]() In this quick tutorial, we’re going to add a video on a polaroid in about 10 minutes using Adobe After Effects. I’ve provided the source files to get you started.
In this quick tutorial, we’re going to add a video on a polaroid in about 10 minutes using Adobe After Effects. I’ve provided the source files to get you started.
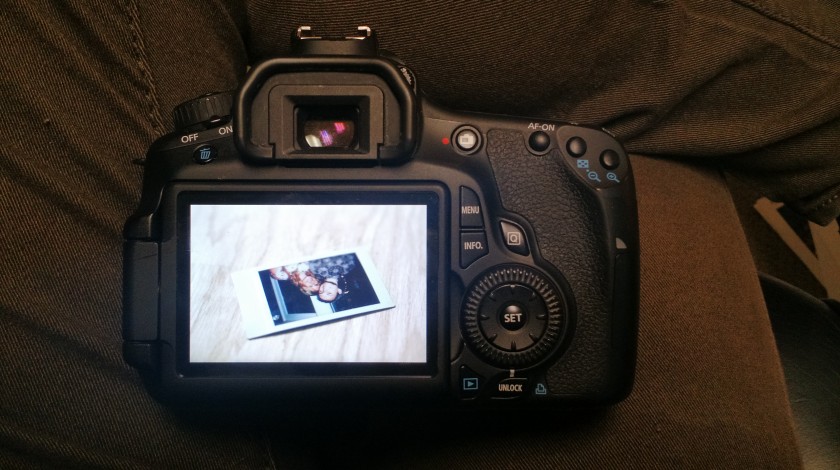
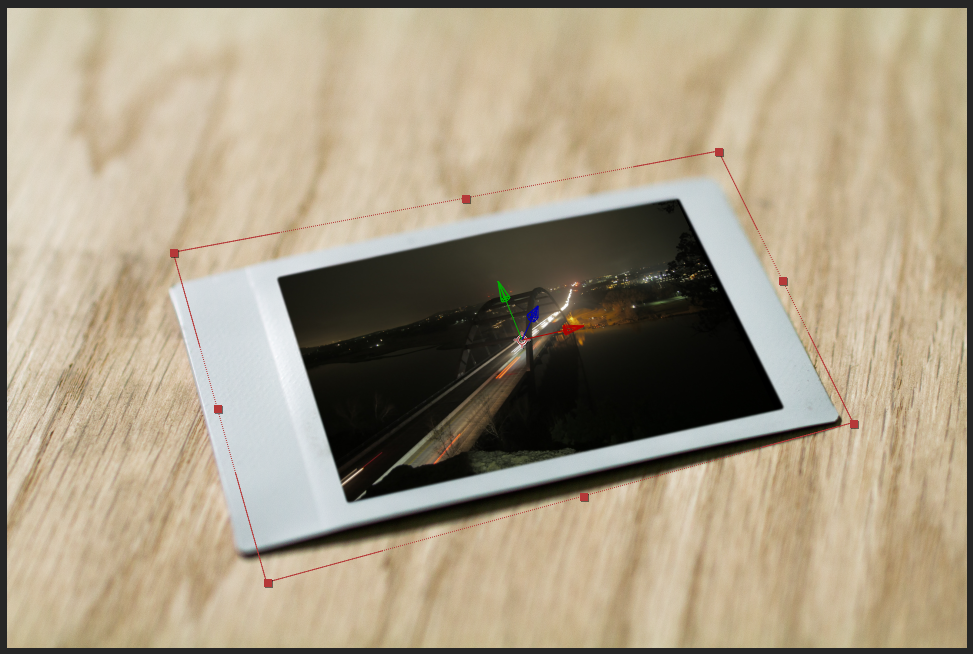
Ok, so let’s get to it. First I took a picture of a Polaroid of my wife and I. I know, I know, we’re cute.
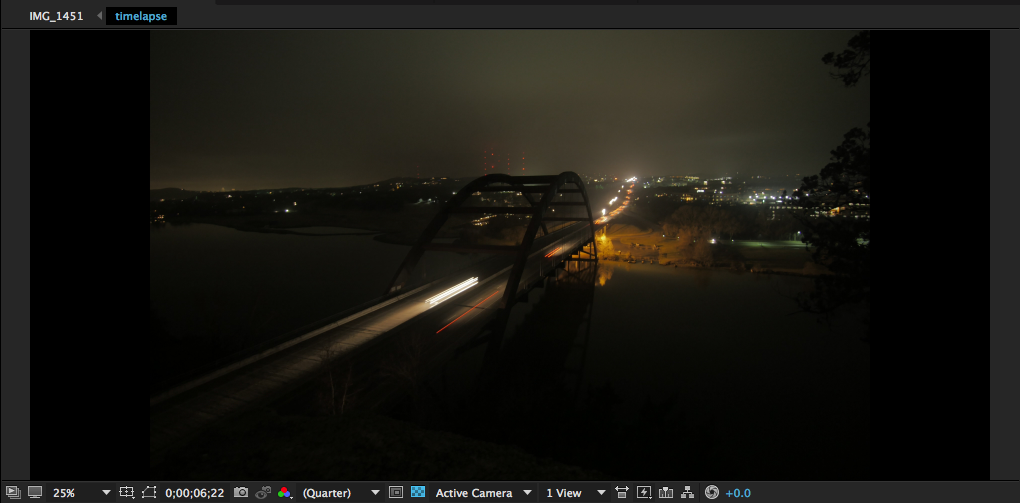
Next, I found the video that I wanted to use as the looping video on the Polaroid. I used a night timelapse that I shot last year of the Austin 360 bridge. Finding a reason to recycle old footage is always fun.
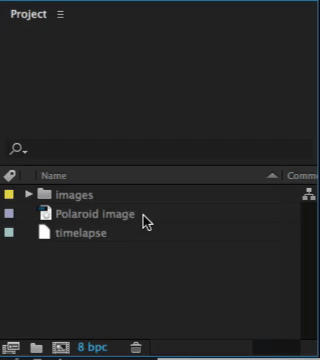
Next, import both of them into After Effects and make a new comp with the Polaroid image. You can do this by dragging the Polaroid image onto the “new comp” icon in the project window.
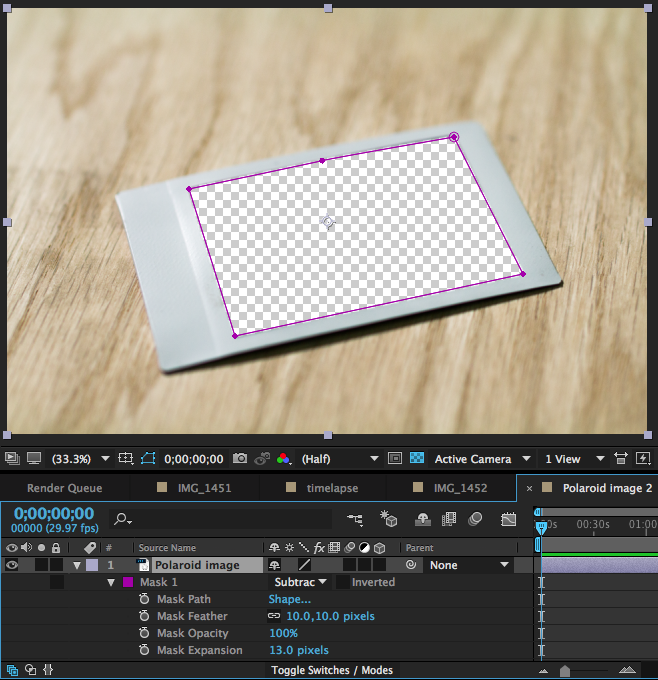
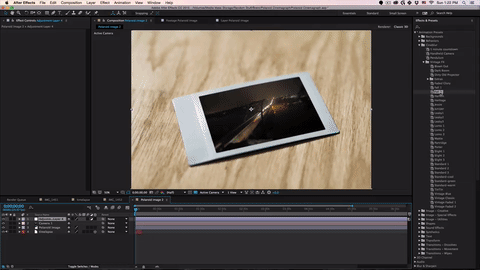
Next, with the pen tool, carefully draw a mask around the picture on the Polaroid. Add a slight feather of 10 to the mask. And expand the mask a bit with the “mask expansion” parameter.
Next, add your video under the Polaroid image layer and make the video layer 3D. The reason we do this, is so we can rotate it to match the angle of the Polaroid. Scale the video down and rotate it so it fits in the Polaroid. Notice how the guide box roughly matches the edge of the Polaroid.
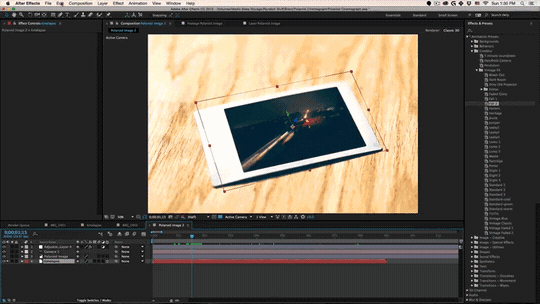
Next, let’s add some depth of field and blur the edges so they look out of focus. You could do a couple things to achieve this. The way we’re going to do it is by adding a camera to the comp and use the built in “Depth Of Field” parameter on the camera.
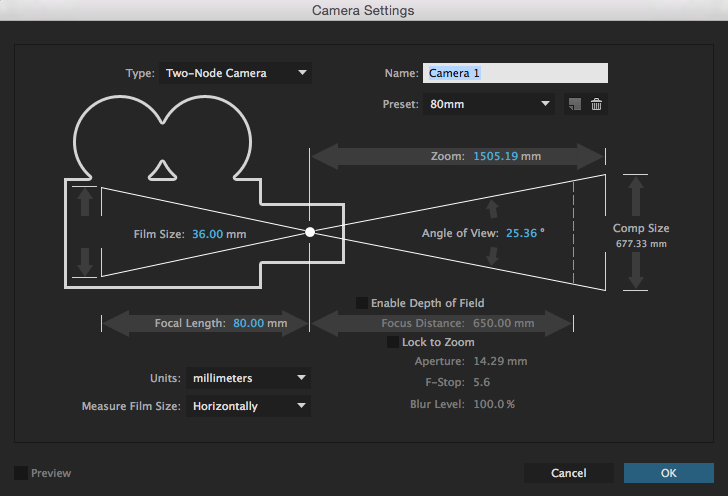
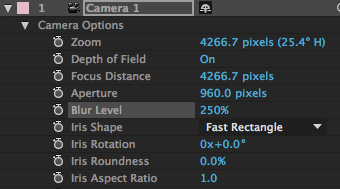
So, create a new camera by going to “layer/new/camera” (option, command, C). You can use the 80mm preset since that matches the focal length that the actual image was taken.
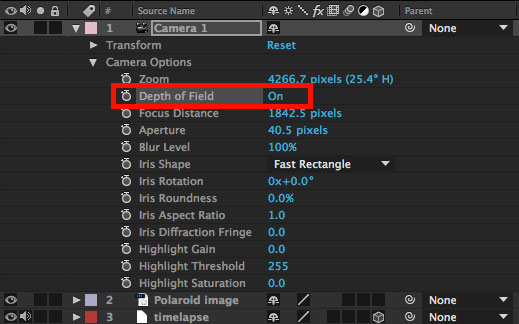
Now, we need to enable “Depth Of Field” and set the focus distance to the timelapse layer. Twirl down your camera options in your timeline, or press AA to show them. And enable “Depth Of Field.”
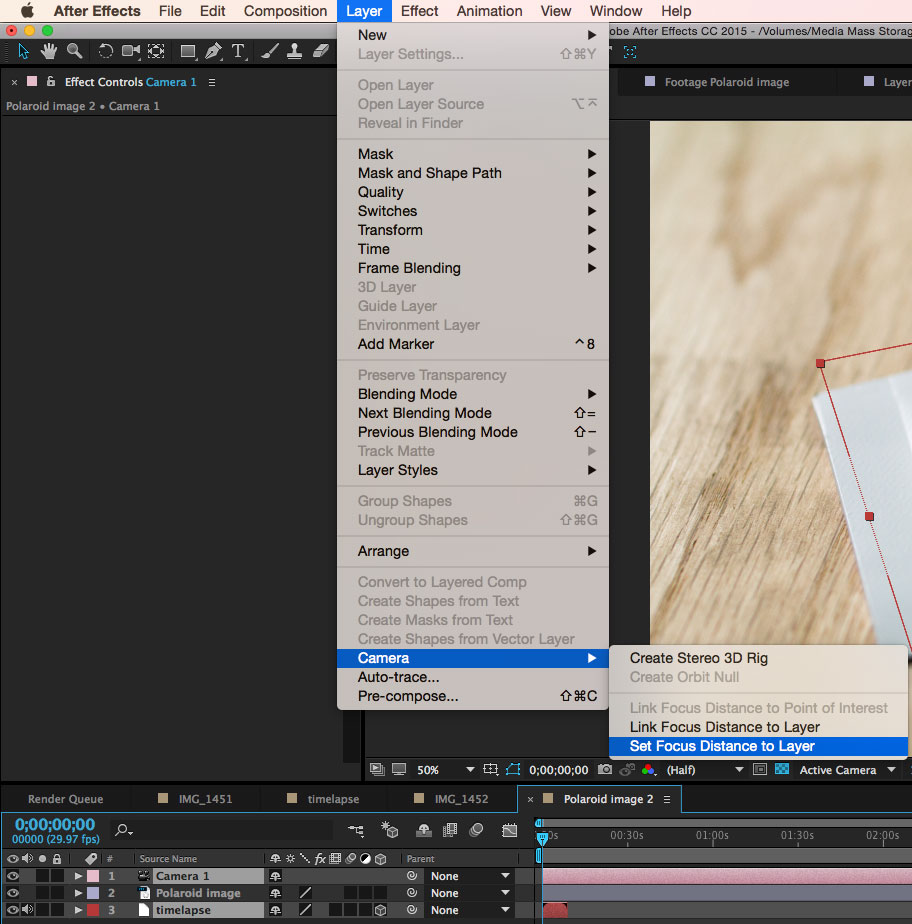
Now, to automatically set your focus distance to your timelapse layer, we need to select both our camera and our timelapse layer, then go to “Layer/Camera/Set Focus Distnace to Layer.” Make sure both your camera and the timelapse layers are selected. You can select multiple layers by holding command.
Nice. Now, let’s adjust our depth of field to match our shot. By bringing up the “Aperture,” it will make the focus plane narrower. And by bringing up the “Blur Level,” it will increase the blur of everything that’s not in focus. Play around with these two parameters until it matches. I landed on Aperture: 960 pixels and Blur Level: 250%.
Now we’re rocking. To add some final touches, I added a “Vintage FX” preset to bring it all together. A GIF isn’t a real GIF without a vintage filter. I added this to an adjustment layer so it affects both the Polaroid picture and the timelapse video. You may have to brighten up the timelapse footage so you don’t loose too much detail in those shadows.
GIF’s are better when they’re short and when they loop seamlessly. Let’s make it 3 seconds long. And let’s adjust our timelapse video so it loops seamlessly at 3 seconds. Basically, split your timelapse layer at 1.5 seconds by going to “edit/split layer” (command, shift, D). Then drag your beginning layer to start at 1.5 seconds. Drag the other layer to start at the beginning. Then fade the top layer out so it fades into the bottom layer. And set your work area so it’s only 3 seconds long.
Boom! Now export it and convert it into a GIF. The easiest way is to use a plugin script via aescripts called “GifGun”. You could also use an online tool called “GIPHY.” But, you’re only limited to a few seconds and the converted GIF’s are tiny. If that’s ok with you, then great, use GIPHY! You can also use Photoshop’s “save for web” tool. It’s kind of finicky, but it works.
That’s it! You just made a cinemagraph. Now make sure to show your friends and tell them you found a magic Polaroid from the Harry Potter world. I’m sure they’ll totally believe you. If you have any questions or maybe additional tips that would make this better, post them below.